
How to Adjust a Grandfather Clock (Complete Guide in 10 Steps)
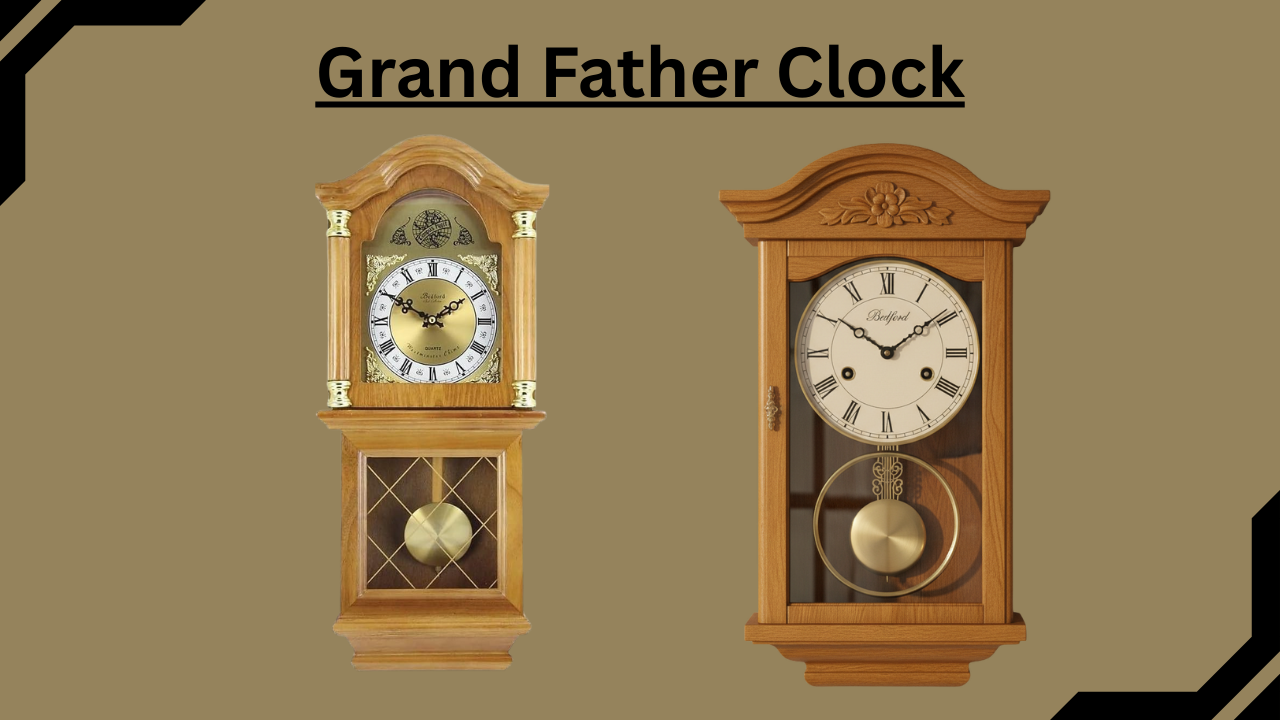
Step 1:Understand the Parts of Your Grandfather Clock
Hello, dear, I hope you are well today. We will talk about how to adjust a grandfather clock, and we learn about multiple parts of grandfather clocks, so let’s get started. A grandfather clock is more than just decor; it’s a precise timekeeping instrument made up of delicate mechanical components working in harmony.
Whether you own a modern grandfather clock or a cherished family heirloom, knowing its internal structure is essential. Before you adjust the time or regulate the chimes, it’s important to understand how each part functions. Learning when and how to adjust your grandfather clock ensures it runs smoothly and maintains its accuracy for years to come. If it ever drifts off time, a careful adjustment can bring it back to perfect rhythm.
Key Parts of a Grandfather Clock and How They Work
Understanding the essential components of a grandfather clock is the first step toward maintaining and adjusting it correctly. Each part plays a crucial role in how the clock functions, from accurate timekeeping to its signature chimes.
Clock Face (Dial)
This is where you read the time. Some grandfather clocks also feature moon phases or calendar details on the dial. While it appears simple, it’s powered by a precise system of gears behind the scenes.
Pendulum
The pendulum regulates time through its steady swinging motion. A shorter pendulum makes the clock run faster; a longer one slows it down. When your grandfather clock starts gaining or losing time, this is often the part you’ll need to adjust.
Weights
Most models include three weights: the left one powers the chimes, the center controls timekeeping, and the right handles the hourly strike. These weights descend gradually and must be wound regularly. Keeping them balanced ensures the clock stays accurate—and may require the occasional adjustment.
Chains or Cables
These connect to the weights and are used for winding. You can pull the chains or use a crank to lift the weights back into position. Without this routine, your clock will eventually stop.
Chime Rods and Hammers
These components produce the distinctive grandfather clock melody. As the hammers strike the rods, they create the rich, resonant sound that’s often associated with elegance and tradition.
Moon Dial (if present)
This rotating moon-phase dial adds a decorative and historical touch. Though not essential for function, keeping it properly aligned enhances the overall aesthetic—and may require periodic adjustments for accuracy.
Learning how each part works empowers you to properly care for and adjust your grandfather clock without risking damage. With the right knowledge, maintaining this timeless piece becomes a rewarding experience.
Step 2: Ensure the Clock Is Perfectly Level
Leveling your grandfather clock is not a cosmetic issue; it’s foundational to its functionality. If the case tilts even slightly, the pendulum may not swing evenly, leading to inaccurate timekeeping or a clock that stops altogether.
Here’s How to Level Your Clock Properly:
- Place a Carpenter’s Level Across the Top and Sides:
Check the front-to-back and side-to-side level. You want the bubble centered in both directions. Don’t rely on your eyes—many floors and walls aren’t as straight as they appear. - Adjust the Clock’s Leveling Feet or Base:
Most floor-standing grandfather clocks have adjustable feet. Turn them slowly to raise or lower the clock until the level reads perfect. If your model doesn’t have adjustable feet, use flat shims under the base. - Test with the Pendulum Swing:
Once level, gently push the pendulum and listen to the tick-tock sound. It should be even and rhythmic. If it sounds uneven—like “tick… tock… tick… tock”—the clock is not properly leveled, or the pendulum is off-center.
Pro Tip: Always check level again if you move the clock, even slightly to Adjust a Grandfather Clock. Uneven floors or shifting over time can cause imbalances that affect performance.
A properly leveled clock ensures that the pendulum maintains a steady swing, which is essential for accurate and consistent timekeeping.
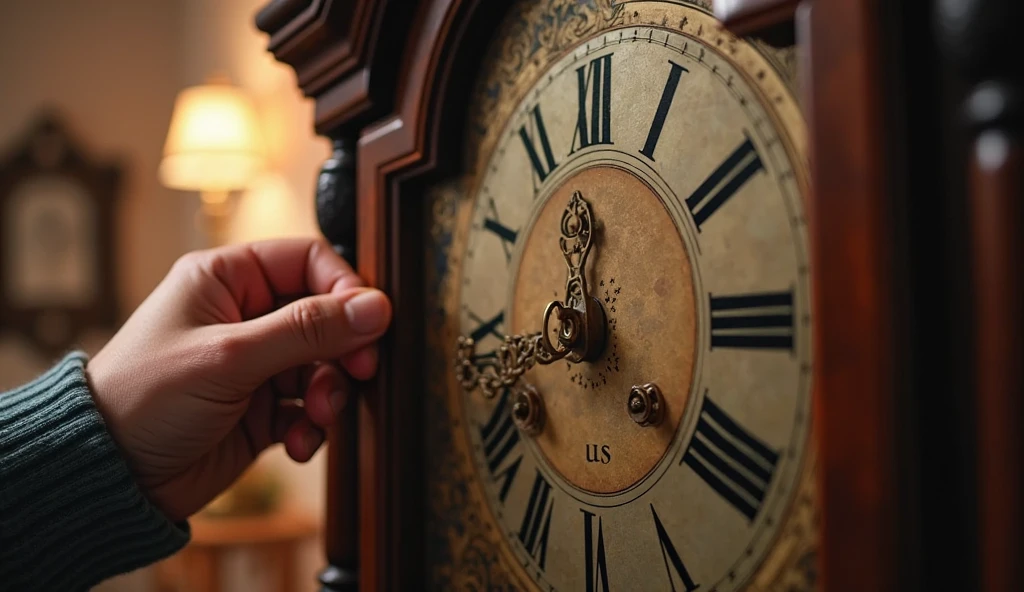
Step 3: Set the Time the Right Way
Setting the time on a grandfather clock isn’t as simple as turning the hands. There’s a correct method to prevent chime misalignment and internal gear damage. If you do it incorrectly, the clock may chime at the wrong time—or worse, stop functioning.

Follow These Safe Steps to Set the Time:
- Only Move the Minute Hand (Never the Hour Hand):
Always move the minute hand clockwise. The hour hand will follow on its own. Forcing the hour hand can strip the gears or throw off the striking mechanism. - Pause at Each Quarter Hour (15, 30, 45, and 60 minutes):
As you rotate the minute hand, stop briefly at every quarter-hour mark and allow the chimes to complete before continuing. This ensures the chime mechanism stays in sync with the clock hands. - If You Overshoot the Time:
Never rotate the hands backward. Instead, keep moving forward one full cycle, allowing all chimes to complete until the clock reaches the correct time again. - Final Touch:
Once the time is set, double-check that the chimes match the hour. If your clock is chiming three times at 4 o’clock, you may need to manually sync the chimes (covered in Step 6). - Important: Avoid turning the hands rapidly. The delicate gears inside are designed for slow, deliberate movement.
Setting your clock the right way preserves its internal mechanism and ensures both the hands and chimes operate in perfect harmony.
Step 4: Start the Pendulum Properly
Once your grandfather clock is level and set to the correct time, it’s time to start the pendulum. This step may seem simple, but how you initiate the pendulum swing has a direct impact on the clock’s performance.

How to Start the Pendulum Swing:
- Open the Clock Door:
Carefully open the front glass or side panel to access the pendulum. Make sure nothing is obstructing its path. - Give the Pendulum a Gentle Push:
Gently nudge the pendulum to one side; about an inch is enough. Avoid any hard or forceful motion; the movement should be smooth and natural. - Listen for the Tick-Tock Rhythm:
Stand still and listen to the sound of the pendulum. It should produce an even, rhythmic tick-tock. If you hear an irregular pattern (e.g., “tick… tock-tick”), the clock may not be level, or the pendulum bob may be slightly misaligned. - Observe the Swing Duration:
A well-adjusted pendulum will swing steadily for several seconds on each side, completing a full swing every 1 to 1.5 seconds depending on the model. - Important Note: Never start the pendulum without first ensuring the clock is level. A tilted frame will throw off the arc and stop the clock prematurely.
Starting the pendulum correctly is crucial to maintaining uninterrupted movement and accurate timekeeping.
Step 5: Fine-Tune the Clock’s Timekeeping Accuracy
Even after the clock is running, it may not keep perfect time right away. Small variations in temperature, humidity, and placement can cause the clock to run slightly fast or slow. Fortunately, grandfather clocks are designed with built-in time adjustment methods.

How to Regulate the Time:
- Use the Rating Nut (Located Below the Pendulum Bob):
- To Slow Down the Clock: Turn the rating nut to the left (counterclockwise) to lower the pendulum bob.
- To Speed Up the Clock: Turn the rating nut to the right (clockwise) to raise the bob.
- Make Small Adjustments:
Turn the nut only one or two full turns at a time, then monitor the clock for 24–48 hours before making further changes. Grandfather clocks respond gradually, not instantly. - Track the Accuracy:
Keep a notebook or use a smartphone to track the exact time gained or lost per day. This will help you fine-tune more precisely with each adjustment. - Rule of Thumb: One full turn of the nut typically changes the time by about 10–15 seconds per day, depending on your clock model.
By regulating the pendulum with small, patient adjustments, you’ll bring your clock into perfect synchronization over time.
Step 6: Sync the Hourly Chimes with the Hands
It’s common for a grandfather clock’s chimes to fall out of sync with the hands, especially after a move or long pause in operation. When this happens, your clock might chime three times when the dial reads 4 o’clock, or vice versa. Luckily, there’s a simple manual fix.

Here’s How to Synchronize the Chimes:
- Let the Clock Chime Fully on the Hour:
Wait for the clock to chime. Count how many strikes you hear. - Compare the Chime Count to the Hour Hand:
If the hour hand reads 5 but you only hear 3 chimes, the two are out of sync. - Manually Move the Hour Hand Only:
Gently move the hour hand (not the minute hand) to match the number of chimes. This is safe to do because the hour hand is friction-fitted and doesn’t affect the chime mechanism directly. - Double-Check at the Next Hour:
Let the clock continue running and listen to the next chime sequence. It should now match the time shown. - Note: You don’t need to take the clock apart or adjust gears for this. Simply realigning the hour hand with the chime count resolves most sync issues.
Fixing the chime synchronization is essential not only for accurate time-telling but also for preserving the auditory beauty and tradition of your grandfather clock.
Step 7: Properly Wind the Clock
Winding your grandfather clock is a crucial part of its maintenance routine. If you don’t wind the clock regularly, it will stop running, and in some cases, you may damage the movement. Winding the clock ensures that the weights are lifted and ready to drive the mechanism for another cycle.

How to Wind Your Grandfather Clock:
- Use the Correct Key or Winding Mechanism:
Most grandfather clocks come with a specific key for winding the clock. This key fits into the winding holes located on the clock face or lower dial. Be sure to use the correct key for your model. - Wind the Weights One at a Time:
Start by winding the time weight (usually the center weight). Turn the key in a clockwise direction. Repeat for the chime and strike weights, winding them one by one. - Don’t Overwind:
As you wind each weight, you’ll feel increasing resistance. Stop winding once the resistance becomes firm, but don’t continue past that point. Overwinding can cause damage to the movement or cause the key to break. - Check the Weights Regularly:
Weights typically need to be wound every 7 days (or more often, depending on the clock). Set a reminder in your calendar to ensure the clock is always running on time. - Tip: If your clock has multiple chains or cables, be careful not to cross or tangle them while winding. This can lead to issues with the clock’s functionality.
Step 8: Adjust for Daylight Saving Time or Time Zone Changes
Grandfather clocks, being mechanical, do not adjust automatically for daylight saving time or time zone changes. However, adjusting the time is straightforward, and you can easily reset it when necessary.

How to Adjust Your Clock for Daylight Saving Time:
- Manually Move the Minute Hand:
- For spring forward (daylight saving), move the minute hand one hour ahead.
- For fall back (standard time), move the minute hand one hour back.
- Pause at the Hourly Chime:
Allow the clock to finish chiming when you pass the hour. This will prevent the chimes from getting out of sync with the hands. - Recheck the Chime Synchronization:
After adjusting, listen to the chimes and make sure they match the hour displayed on the clock. If necessary, use Step 6 to realign the hour hand to match the chimes. - Pro Tip: It’s always a good idea to wind the clock after making time adjustments, especially after a long reset, to ensure the internal gears engage properly.
Step 9: Perform Seasonal Maintenance
Grandfather clocks, like all mechanical devices, need regular care and attention to perform at their best. Seasonal changes in temperature and humidity can affect the accuracy of the clock, and regular maintenance will help extend its life.

How to Perform Basic Seasonal Maintenance:
- Dust the Clock Regularly:
Use a soft, lint-free cloth to dust the clock’s case and dial. Dust buildup can cause parts to wear out or affect the movement. Be gentle around the pendulum and weights to avoid misaligning them. - Check the Pendulum for Cleanliness:
Dust on the pendulum bob can slow down the swing, which affects timekeeping. Use a soft cloth or a cotton swab to clean the pendulum gently. - Check for Temperature and Humidity Fluctuations:
Extreme temperatures or high humidity can cause the wood and internal components to expand or contract. Keep your clock away from direct sunlight, air conditioners, and heating vents. Aim for a stable environment around 65-70°F (18-21°C) and 40-50% humidity. - Lubricate the Clock Mechanism (If Necessary):
Most grandfather clocks require periodic lubrication to keep the gears running smoothly. Consult your clock’s manual or a professional clockmaker for advice on how to lubricate it properly.
Reminder: Always consult a professional for any deep cleaning or complex mechanical adjustments. Overzealous cleaning can cause damage.
Step 10: When to Seek Professional Help
Although you can perform most adjustments and maintenance on your own, there are times when it’s best to call a professional. Mechanical clocks are delicate, and improper handling can result in irreversible damage.
When to Call a Professional Clockmaker:
- If the Clock Won’t Start or Stop Suddenly:
If your clock has stopped running or isn’t starting after you’ve followed the proper steps, the movement may require professional attention. - Chime Mechanism Malfunctions:
If the chimes sound off-key or out of sync with the time, this could indicate a mechanical issue that requires the expertise of a clock technician. - Pendulum Problems:
If the pendulum won’t swing evenly or the clock’s timing seems off despite adjustments, it could be an issue with the internal mechanism or a misalignment that needs specialized tools to fix. - Strange Noises or Resistance:
Any unfamiliar grinding sounds or resistance while winding may indicate wear or damage within the movement. Don’t try to force the winding key. A professional can assess and repair the issue safely. - Moving the Clock:
If you need to move your grandfather clock (especially a tall, heavy one), hire a professional to avoid damage during transportation. A professional will also help you set up and level the clock in the new location. - Tip: Keep your clock’s manual and service history on hand for the technician to help them identify any recurring issues and make repairs faster.
Conclusion
In conclusion, adjusting and maintaining a grandfather clock is both a rewarding and essential task for any owner who values its timeless elegance and functionality. By following the 10 steps outlined in this guide, you can ensure that your clock runs smoothly, keeps accurate time, and continues to delight with its signature chimes.
From setting the time and winding the clock to fine-tuning its pendulum and performing seasonal maintenance, each step plays a vital role in preserving the integrity of your clock. Regular attention to these adjustments will prevent mechanical issues, improve timekeeping accuracy, and maintain the visual appeal of your clock for years to come.
Remember, while many of the adjustments can be handled independently, seeking professional help for complex issues will safeguard your clock’s longevity and performance. Whether it’s a minor tweak or a major repair, consulting a professional clockmaker ensures that your grandfather clock remains a cherished piece of your home for generations.
By mastering these techniques, you not only keep your clock in top working condition but also appreciate the craftsmanship and history behind these beautiful timepieces. With patience and attention to detail, your grandfather clock will continue to stand as a symbol of both precision and tradition, ticking gracefully through the years.
FAQs
How do I set the time on my grandfather clock?
To set the time on your grandfather clock, gently move the minute hand forward or backward. Always adjust the minute hand and avoid moving the hour hand directly. Ensure the clock is in a stable, level position before adjusting the time, as this helps maintain its accuracy. Never force the hands as this can damage the movement.
How often should I wind my grandfather clock?
Grandfather clocks typically need to be wound once a week, or every 7 days. You can wind the clock by using the appropriate key and turning it clockwise for each weight: time, chime, and strike. Be careful not to overwind the clock, as this can cause damage to the movement.
What if my grandfather clock doesn’t chime correctly?
If your grandfather clock’s chimes aren’t working properly, first ensure that the clock is level. If it’s still off, you may need to adjust the chime synchronization. To do this, gently move the hour hand to match the chime count, making sure the chimes align with the time on the dial.
Why does my grandfather clock run fast or slow?
A grandfather clock may run fast or slow due to temperature changes, humidity, or incorrect pendulum settings. To correct this, use the rating nut to adjust the pendulum’s length. Turning it clockwise speeds the clock up, while turning it counterclockwise slows it down. Make small adjustments and monitor the clock’s time over a couple of days.
How do I clean my grandfather clock?
To clean your grandfather clock, dust the case, dial, and pendulum using a soft, lint-free cloth. Avoid using harsh chemicals. You can also clean the pendulum bob gently with a cloth or cotton swab. For deep cleaning, it’s recommended to consult a professional clockmaker to avoid damaging the movement.
How do I adjust the pendulum on my grandfather clock?
To adjust the pendulum on your grandfather clock, locate the rating nut on the pendulum rod. Turning it clockwise raises the pendulum and speeds up the clock, while turning it counterclockwise lowers the pendulum and slows the clock down. Make small adjustments and check the time after 24–48 hours.
Can I move my grandfather clock by myself?
It’s not recommended to move your grandfather clock by yourself due to its size, weight, and delicate mechanics. Always hire a professional clock mover to ensure the clock is properly disassembled, transported, and reassembled without damaging its internal components.
How do I fix the chimes if they are out of sync with the hands?
To fix the chimes on a grandfather clock, listen to the chime pattern. If they don’t match the time, gently adjust the hour hand without moving the minute hand. The hour hand is friction-fitted and can be manually repositioned to sync with the chimes. Ensure the clock is running before making this adjustment.
What should I do if my grandfather clock has stopped running?
If your grandfather clock has stopped running, first check if the weights are fully wound. If the weights are fine, check if the pendulum is swinging freely and if the clock is level. If issues persist, consider consulting a clockmaker as the movement may need lubrication or repair.
How do I adjust my grandfather clock for daylight saving time?
To adjust your grandfather clock for daylight saving time, move the minute hand one hour forward in the spring and one hour backward in the fall. Always adjust the minute hand and not the hour hand. Check that the chimes are synchronized with the new time after the adjustment.
What causes a grandfather clock to stop chiming?
If a grandfather clock stops chiming, it may be due to misalignment or a mechanical issue in the chime mechanism. Ensure the clock is level and the pendulum is swinging correctly. If the chimes still don’t work, the clock’s chime gears or internal components may need professional servicing.
How do I know if my grandfather clock needs lubrication?
Grandfather clocks require periodic lubrication to keep their gears running smoothly. If you hear unusual noises or resistance while winding, it could be an indication that the internal gears need lubrication. Lubrication should be done by a professional clockmaker to avoid over-oiling and causing damage to delicate parts.
Why is my grandfather clock ticking unevenly?
An uneven ticking sound often indicates that the clock is out of balance. This can happen if the clock is not level, or the pendulum is misaligned. Check that the clock is on a stable, level surface and that the pendulum is swinging freely. Small adjustments to the rating nut may also help balance the timing.
Can temperature and humidity affect my grandfather clock?
Yes, temperature and humidity changes can impact the accuracy of your grandfather clock. Wood can expand or contract with fluctuating temperatures and humidity levels, which can affect the pendulum’s swing. Try to keep your clock in a stable environment, ideally between 65-70°F (18-21°C) with 40-50% humidity.
How often should I call a professional to service my grandfather clock?
A professional clockmaker should service your grandfather clock every 3 to 5 years for optimal performance. This can include cleaning, lubricating, and checking for mechanical issues. If you notice any issues like irregular chimes or timekeeping problems, it’s best to consult a clockmaker sooner.


Post Comment